Germination Testing — Do It Now to Get Ready for the Season

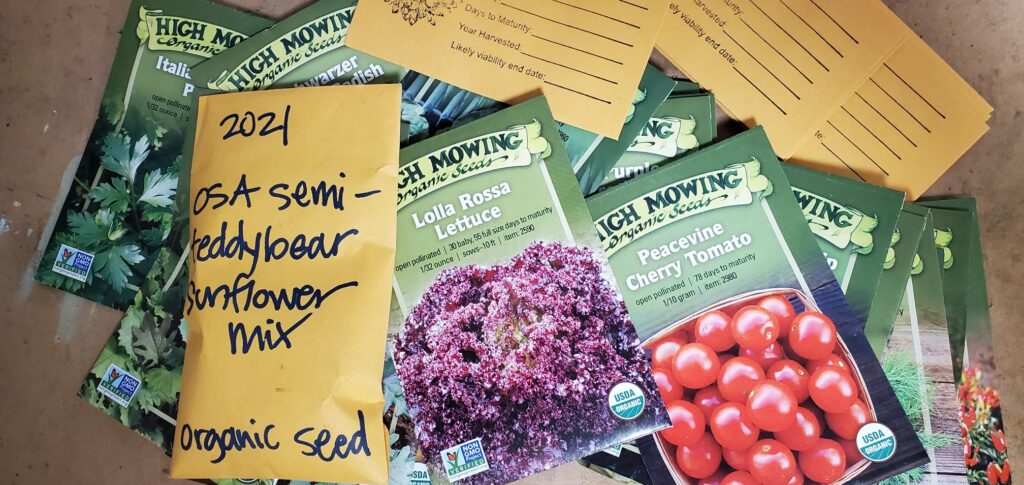
Now is a great time to evaluate your seeds. It’s a fun rainy (or snowy) day project to pull out the box and flip through the packets. What did well? What did poorly? What can’t you wait to plant again? Perhaps most importantly, what can you take to the seed swap and be sure your gardening friends will be getting good seed?

As you hold an older packet in your hand, one big question comes to mind: Are these seeds still viable? Three years is a good general cutoff date, but some will last much longer. And if you haven’t been as careful as you should have in storage, they might not sprout. So how do you know?

There’s a pretty easy way to find out if the seeds are still good: do a germination test. Here’s one way to do it, in 5 steps. As an example, I will use a test that I began today.

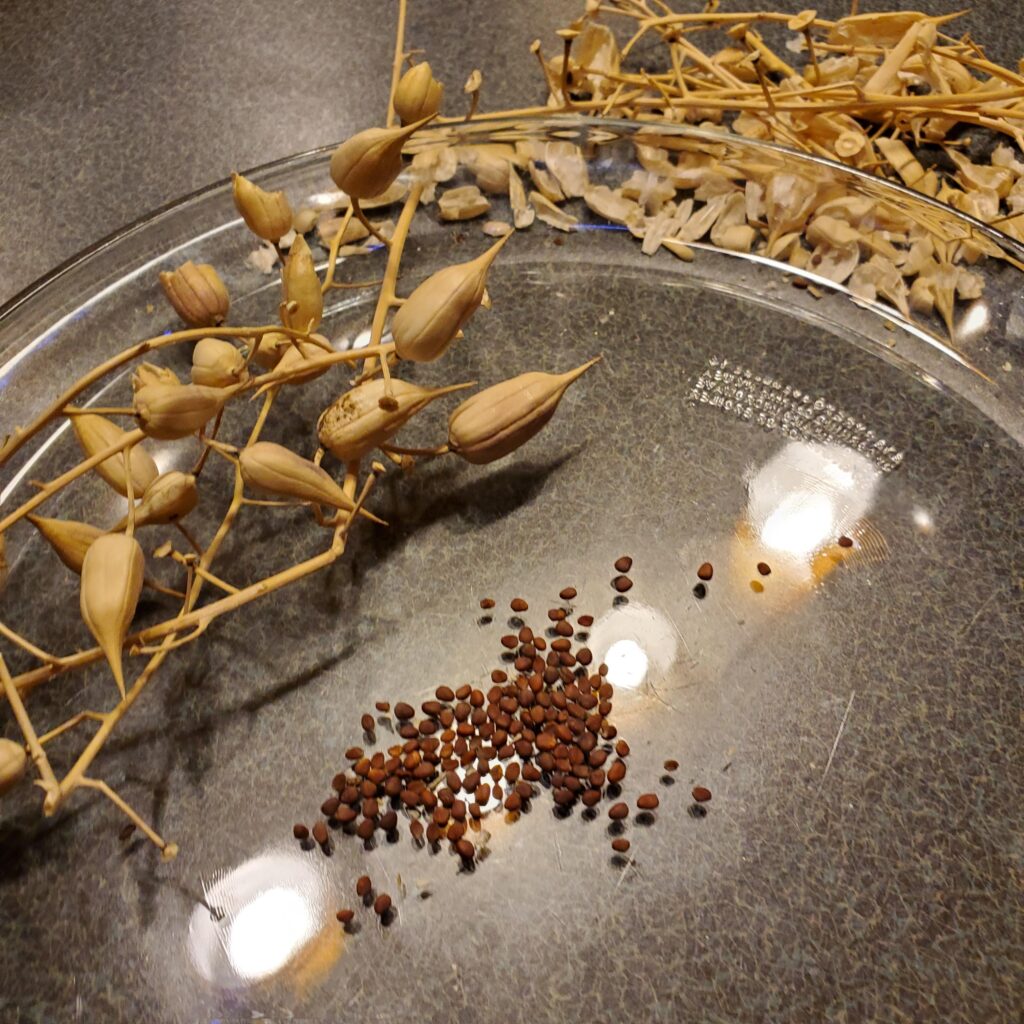
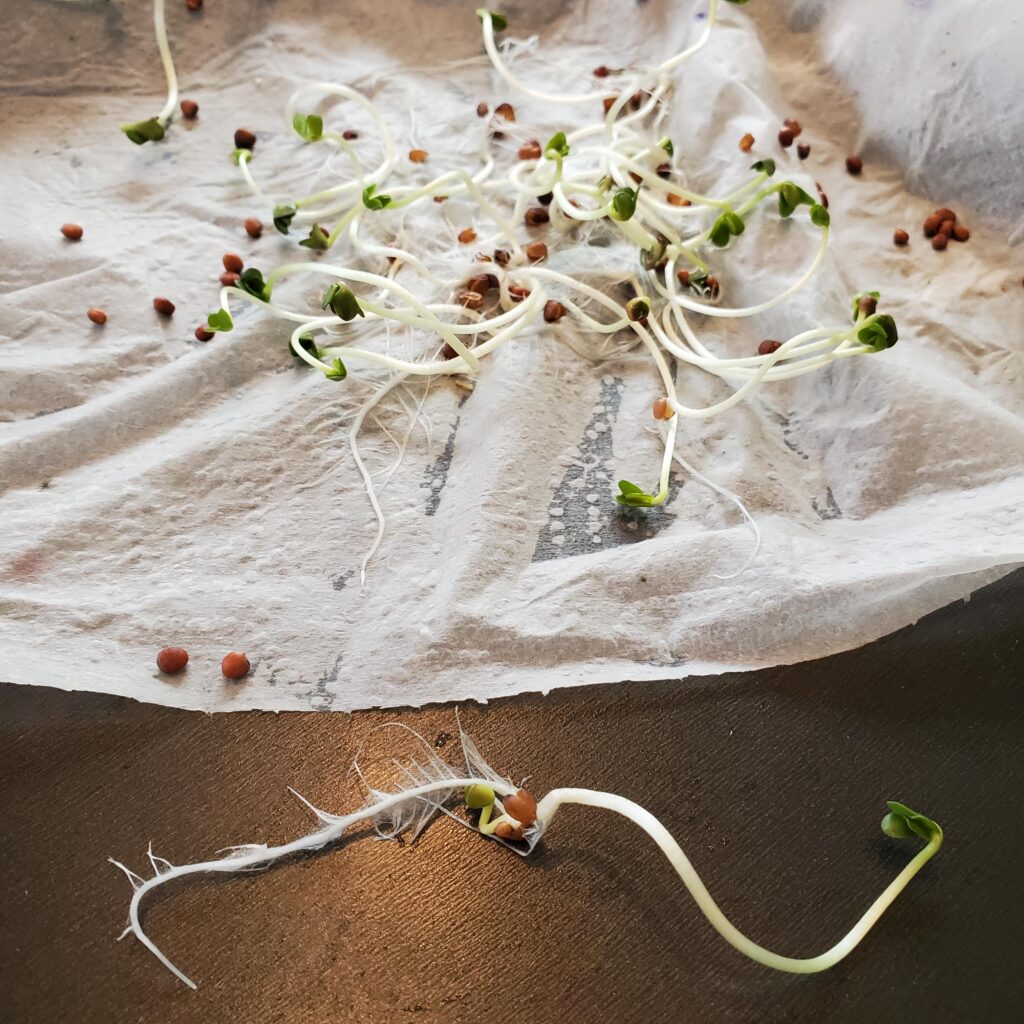
1. Count out a good quantity of seeds. In this test, I used Black Spanish Radish (Raphanus sativus) from 2020. This was the last of a large bag tied up in the garage. I shelled them from their pods until I had 100 seeds.

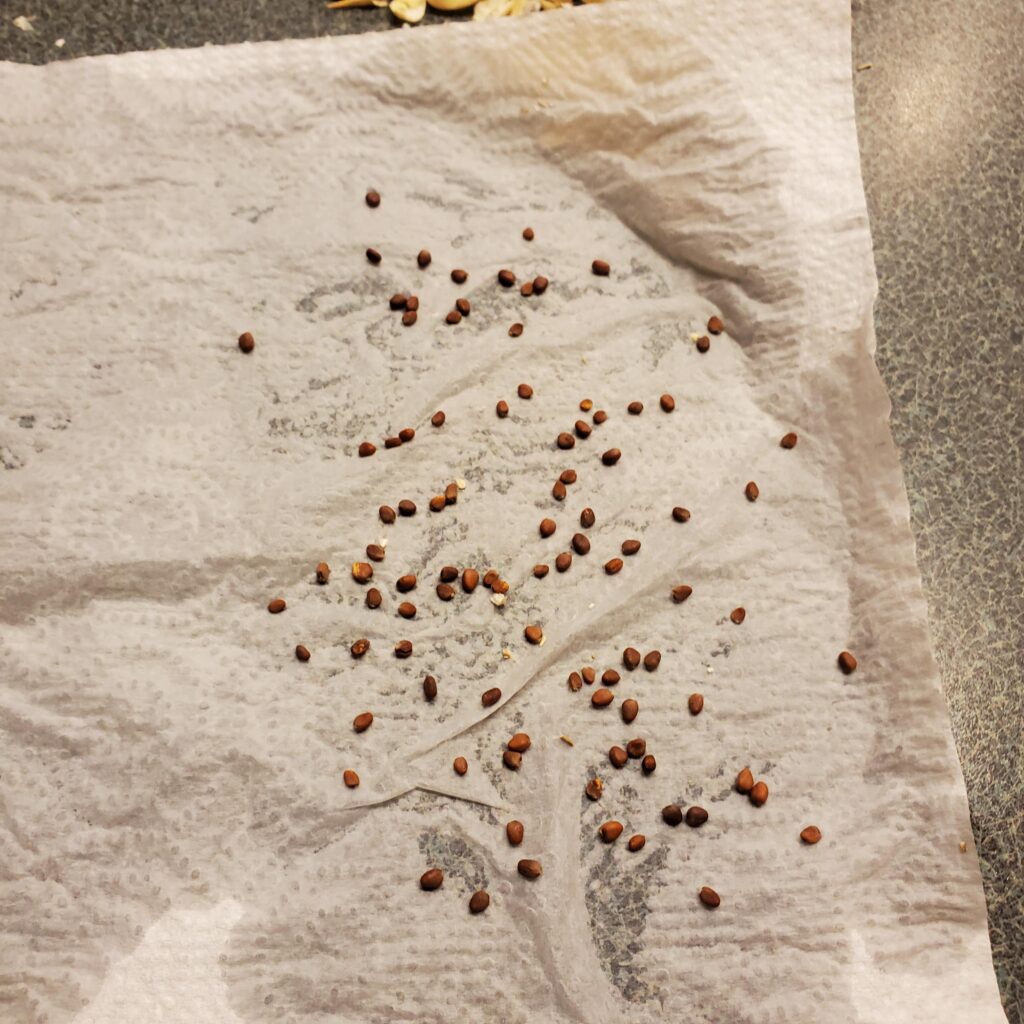
2. Place the seeds on a moistened paper towel. This will give them a place to germinate.

3. Fold over the paper towel and insert it in a large zippered plastic bag. Lay it flat in a warm place out of the way. I use the top of my refrigerator.

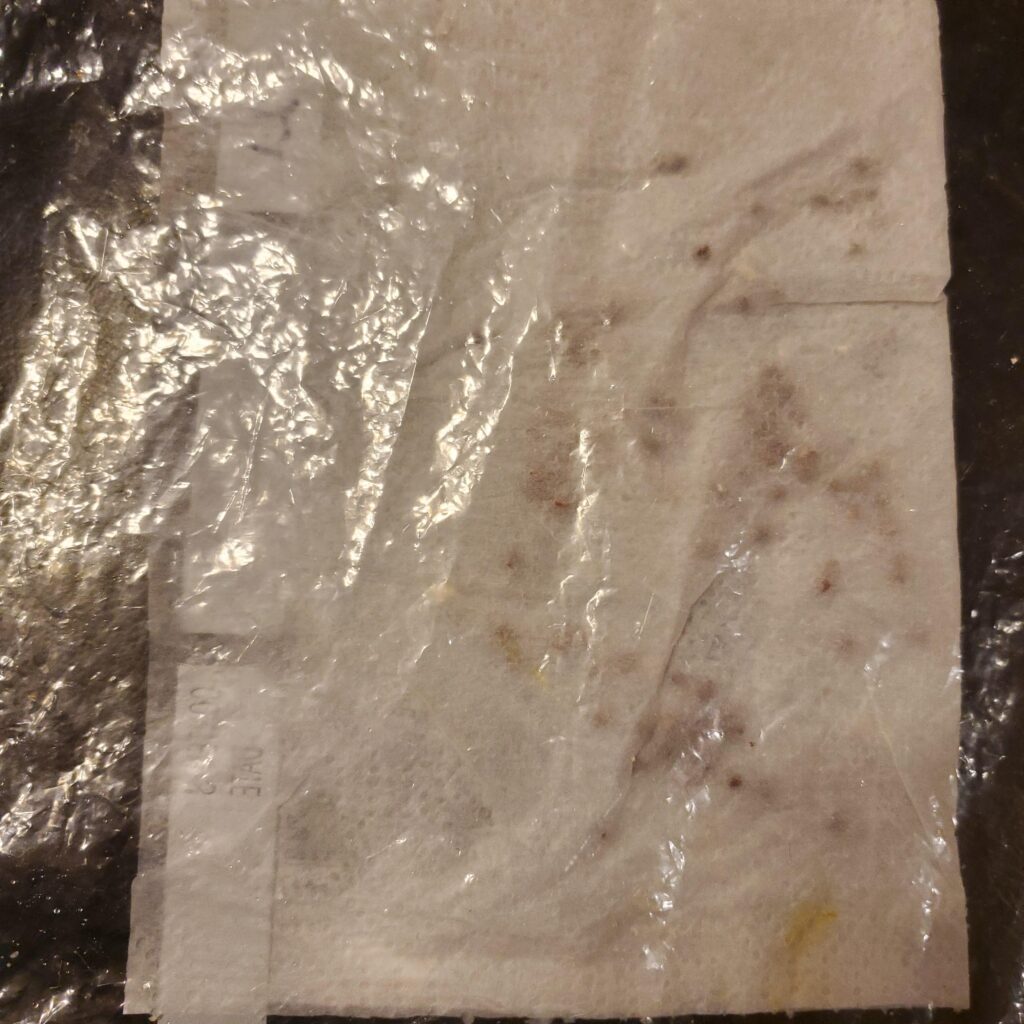
4. Monitor the project daily for the next two weeks. Don’t let the paper towel dry out–the seeds need the moisture to sprout. Just open the bag and sprinkle a little water on the paper, or squirt it with a mister. Keep it moist, but not too wet.

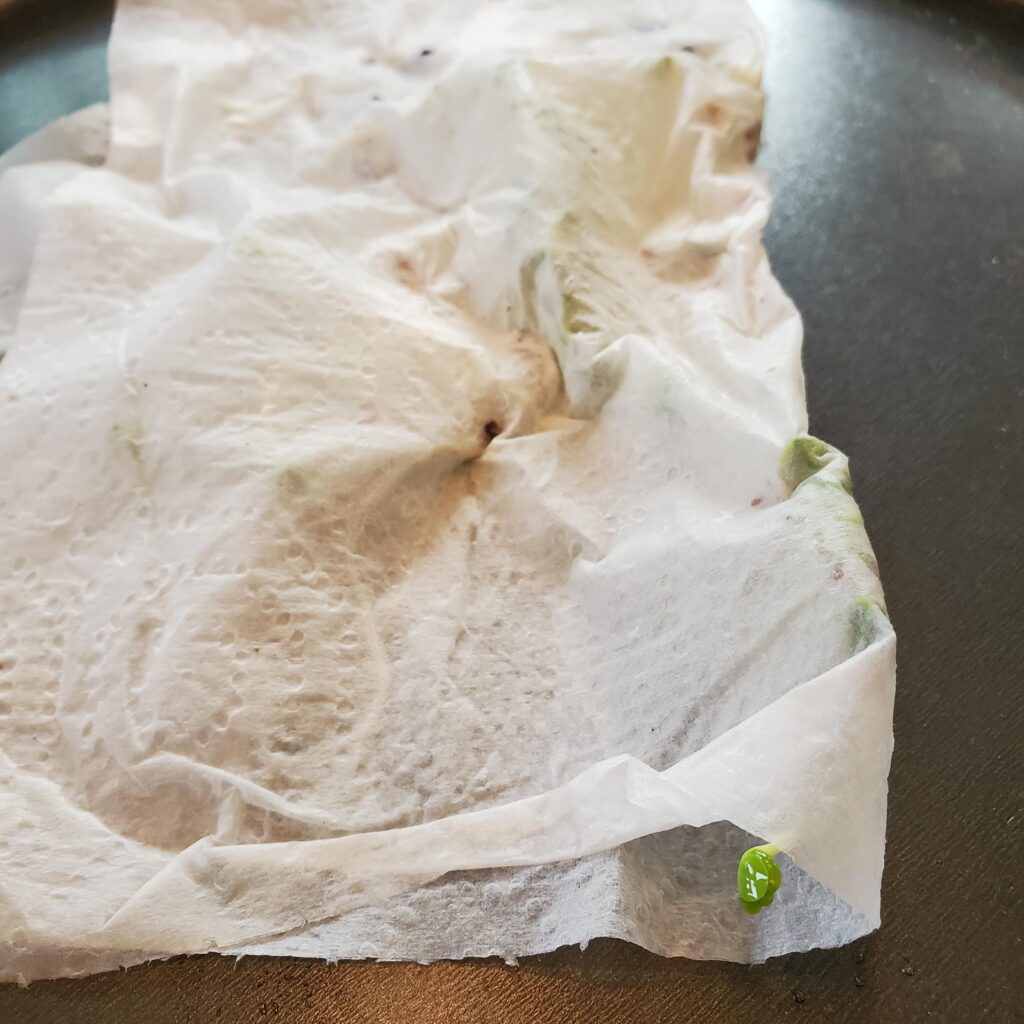
5. Some seeds sprout within a few days, while others can take up to two weeks. When you see the first ones sprout, wait a few more days. Then open it up and count the little green shoots. The seed would be considered viable to share if more than 60 percent of the seeds sprout in your test. A higher number would be much better. At 50 percent or below, it’s best to just toss those seeds on the compost heap and buy (or swap for) fresh seed.

I’ll update this post with the results of my test, so check back in a couple of weeks. Meanwhile, start your own germination test–and post your results to our Facebook page!

Update: 60 Percent Germination

Well, after 10 days I pulled the plastic bag from the top of the fridge and saw some pretty good sprouting. Not great, but good. Turns out my Black Spanish Radish seeds are right on the edge of the viability: just over 60 of the 100 seeds sprouted, a 60% germination rate. I will share the seeds this year while letting people know to sow a little more heavily, and then compost any leftover seeds after this season.

Germinated seeds pushed at the paper towel and peeked out.
Check out the amazing root system on this little radish sprout!

There are other methods and of course advice varies. Here are some germination testing resources:
https://extension.illinois.edu/blogs/ilriverhort/2017-02-03-test-seed-viability

https://www.newstribune.com/news/2021/jan/31/Ask-a-Master-Gardener-Germination-test/

https://www.southernexposure.com/how-to-test-germination/

https://www.highmowingseeds.com/blog/how-to-do-a-quick-germination-test-at-home/

Join us at the Seed Swap!

Interesting lettuce? New tomato? Sunflowers for solidarity with Ukraine? Join the Seed Library for the return of our Great Seattle Seed Swap! It’s our first since 2019, and we can’t wait to share seeds with you.

The swap will be Saturday, April 16, 11 a.m. to 1 p.m. at the Phinney Neighborhood Center, 6532 Phinney Ave. N., in the Community Hall of the Brick Building.

Recent donations from the Organic Seed Alliance of their “Teddybear Sunflowers” and from High Mowing seeds will provide new choices for seed-swappers to try this year.
OSA’s Semi-Teddybear Mix. Photo by Bill Thorness.

See our Facebook event and let us know you’re coming!

Do you have seeds to share? Here’s a guide to our preferences for seed-sharing:

  • Share only seeds of edible plants that your fellow gardeners would grow from seed, such as annual vegetables, herbs and edible flowers.
  • If donating packaged seed, it should be organic or open-pollinated, plant types that will produce seed true to the stated variety. Heirlooms are by definition open-pollinated.
  • If donating home-saved seed, please winnow and clean it off the stems or stalks as much as possible and bring only the seed.
  • If you can’t clean it in advance, plan to spend some time cleaning it the swap. We will have screens and buckets available.
  • All shared seed should be fresh, within three years of purchase or saving.
  • Label all seed donations with seed type, variety if known, and year it was grown/saved.
  • Bring envelopes and a pen to store and label your new seeds.

Look forward to seeing you in person soon!

Support our Bioregional Seed Companies

With the current craze to start or revive an edible garden, seed companies have been hit hard. They need to keep their workers safe while filling mountains of orders. Some have stopped taking orders temporarily, or are only shipping to commercial farmers. Many report turnaround times of two weeks to ship an order.

Still, these small businesses deserve our support. Seeds are alive and need to be planted while fresh. So we plead with our supporters to please patronize our bioregional seed companies. Check multiple companies to see who is shipping now. Be patient. Thank them for their work.

Here is a list of seed companies. Those with an asterisk * are outside of the Washington-Oregon region. (Please let us know if we’ve missed any that you think we should include.)

Adaptive Seeds www.adaptiveseeds.com  

Baker Creek Heirloom Seeds https://www.rareseeds.com/

Deep Harvest Seeds www.deepharvestfarm.com

Fedco Seeds https://www.fedcoseeds.com/ *

Filaree Garlic Farm www.filareefarm.com  

Horizon Herbs www.horizonherbs.com  

Irish Eyes Garden Seeds www.irisheyesgardenseeds.com  

Johnny’s Selected Seeds https://www.johnnyseeds.com/ *

Kitazawa Seed Company (CA) www.kitazawaseed.com *

New Dimension Seed www.newdimensionseed.com  

Nichols Garden Nursery www.nicholsgardennursery.com  

Osborne Seed Company www.osborneseed.com

Peace Seeds www.peaceseedslive.blogspot.com

Peaceful Valley Farm & Garden Supply (CA) www.groworganic.com *

Renee’s Garden Seeds https://www.reneesgarden.com/ *

Resilient Seeds https://www.resilientseeds.com/

Seed Savers Exchange (IA) www.seedsavers.org *

Seeds Trust/High Altitude Seeds (CO) www.seedstrust.com *

Seattle Seed Company www.seattleseed.com  

Siskiyou Seeds www.siskiyouseeds.com

Snake River Seed Cooperative (ID) www.snakeriverseeds.com *

Sustainable Seed Company www.sustainableseedco.com

Territorial Seed Company www.territorialseed.com  

Uprising Seeds www.uprisingorganics.com

Victory Seed Company www.victoryseeds.com  

Wild Garden Seed www.wildgardenseed.com  

*beyond Washington or Oregon  

In Troubling Times, Grow With Seeds

Life might seem a bit empty right now, with limitations on our work, school and social activities. But an old Hawaiian proverb says, “When your hands are turned to the soil, you will be full.” So let us keep gardening, the healthy activity that can be done alone or with a loved one. May it fill our spirits as well as our bodies.

Growing edibles begins in earnest now as our soils warm up and the days become longer. Here are some ideas to get started.

Is your soil warm enough to plant?

  • Calculate the soil temperature. Find out the soil warmth by watching the daily highs/lows. Add the daily high and nightly low together, then divide by two. That’s the approximate temperature of open soil. (e.g.: 50+40=90/2=45) It’s more accurate if you do it over the course of a week and then average those, because the soil temp doesn’t move with just one warm day. A soil thermometer will tell you right away if the soil is warm enough to sprout seeds. Most seeds require soil warmed to a depth of 3” to germinate.
  • Temps needed to germinate. Our coolest vegetables (lettuce, peas, chard, parsley, mustard greens, beets, carrots) will sprout in soil as cool as 40 degrees F. Other crops (corn, tomatoes) need at least 50 degrees F, while others (beans, peppers, melons, squashes) need 60 degrees F minimum. Of course, all will sprout faster in soil a little warmer than the minimum.
  • Warm up your soil. You can cover the garden bed for a few days with plastic sheeting to warm it up—but remove the plastic when you begin to plant. That will increase the soil temperature a few degrees above an open garden bed.

“When your hands are turned to the soil, you will be full.”

Start earlier with season extension

  • Raised beds. Are you growing vegetables in a raised bed? If so, the soil may already be getting warmer and drying out, the two key indicators that it will be ready for seeds.
  • Cover the bed. If you have “season extension” covers for your bed, like a cloche or a cold frame, they will really help you get the soil ready. You can plant under season extension two to three weeks earlier than in an open garden bed. But remember to open the device regularly to water the bed so the seeds are kept moist (but not too wet) while sprouting, and so that it doesn’t get too hot under the device on sunny days to wilt the tiny plants.

Is your soil dry enough to plant?

  • Soil readiness test. Here’s an easy test to find out if your soil is ready: Dig up a scoop of soil and pack together a softball-size clump of it in your hands. Hold it in one hand and throw it up in the air about two feet, letting it fall back into your open hand. If it lands with a “splotch!” and water sprays everywhere, it’s still too wet for planting. If it breaks apart easily and crumbles in your hand, it’s dry enough.

If your outdoor garden is not yet ready, you can still start indoors. See our post on Starting Seeds Indoors that includes a list of bioregional seed companies.

Start Seeds Indoors

Stuck at home? Now is a great time to start your edible garden. Many people buy small plants at the nursery, but if that isn’t possible right now, try seeds. Seeds can be started indoors and transplanted out or transferred to larger pots as they grow.

Here are tips on starting seeds.

  • Many seeds can be started in pots indoors and then transplanted out. Try salad greens, peas, broccoli and other brassicas, tomatoes, peppers and squash. Don’t try root crops like beets and carrots—they need to be “direct sown” into the soil.
  • It’s best to use a light seed-starting medium rather than plain garden soil. You can buy it, or make your own with a mixture of compost, peat moss, coco coir, sand and soil—whatever you have available that will be lighter weight than soil. The goal is to make it easier for the seeds to push out of the soil.
  • Plant in very small pots, like “six-packs” of nursery cells, one inch wide by two inches deep. Or use small yogurt containers or take-out food clamshells. Try to have at least two inches of depth.
  • Sow small seed just under the surface of the soil. Bigger seed like peas can be planted deeper.
  • Keep the seed bed consistently moist but not soggy.
  • Keep the seed tray in a warm place while seeds are germinating. A seedling heat mat is a great tool for the avid gardener.
  • Place the seed tray in a sunny indoor spot once the seedlings appear.
  • Be careful when watering. Use a bike water bottle or small watering can to gently water at the soil level.
  • Cool-season crops like salad greens and peas can be planted in the garden when they have two or three sets of “true leaves.” (The first leaves to appear are called the “seed leaves.”)
  • Warm-season crops like tomatoes and peppers should be “potted up” to larger pots and kept indoors until the weather is warmer, with nights consistently at or above 50 degrees F.
  • Before transferring any seedlings to the garden, they need to be “hardened off.” This is done by setting the seed tray outside for an hour one day, two hours the next, etc., for 5 to 7 days. This gets them used to the weather so they will survive better in the open garden. If planting in a warm raised bed or under cover, this step is less important.
  • Water consistently once the seeds are in the garden to help them set their roots and get off to the best start. The surface of the soil should just start to get a bit dry before watering again.

Order your seeds from one of our wonderful bioregional seed companies. Be patient as they are probably experiencing a high volume of orders.

Here are some seed companies to try: